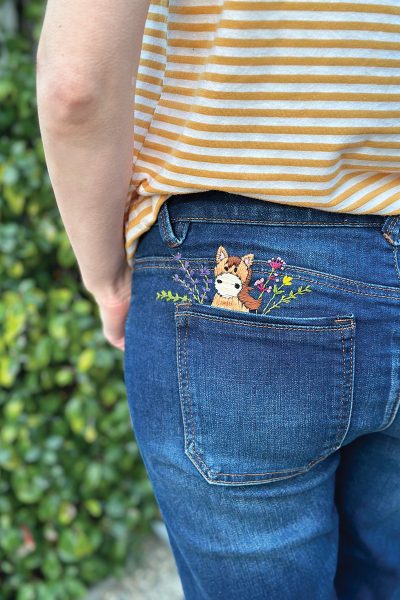
This summer, show off your horsey style by hand embroidering your own jeans with this DIY design! It’s easier than it looks and is a great way to pass the time on those long summer days. This DIY is sure to impress your barn buddies and brighten up any June gloom that comes your way.
Materials
◆ Needle
◆ Scissors
◆ Embroidery hoop
◆ DMC Magic Paper
◆ Embroidery thread (various colors)
◆ Jeans (or anything you want to embroider!)

Instructions
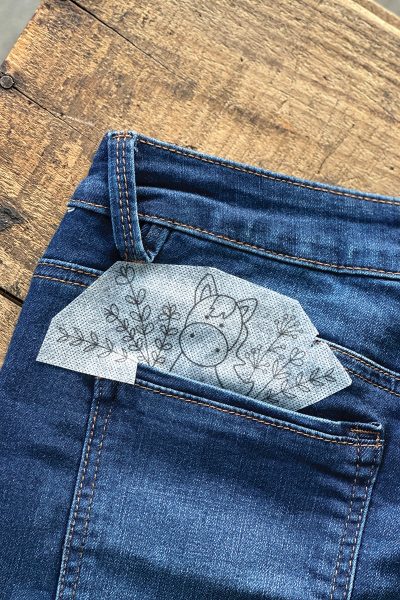
Step 1: Create your design and put it on your Magic Paper. You can draw it, trace it, or even print it. Make sure your Magic Paper is adhesive and water soluble.
Step 2: Cut out your design and stick it on the material you’re going to embroider. Attach the hoop by placing the inner circle under the fabric and the outer circle around your design on the outside. Pull the fabric taut and tighten the screw. This will make embroidering easier.
Step 3: Thread your embroidery thread through the needle and pull through from the inside to the outside and pull gently. Continue to do this in small lines from one side of the outline or design to the other side and repeat—kind of like coloring! For smaller designs, like the flowers and stems, make smaller stitches.
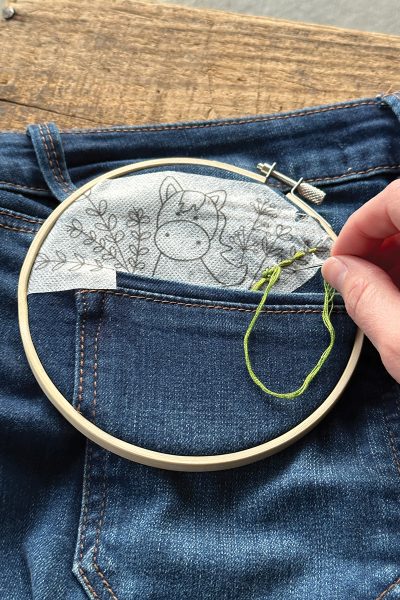
Tip: Embroidery thread is made up of 6 strands of thread in one. When hand-embroidering, you can split this thread to make smaller, thinner thread for smaller designs. For example, the horse in our design used the full 6 strands, but the flowers were made with 3 strands.
Step 4: Continue to stitch until you run out of thread or need to switch colors. Tie a knot on the inside of your material and trim your thread. Repeat steps 3 and 4 until your design is complete.
Tip: To create the eyes and some of the flowers, we used a technique called the French knot. To create the French knot, pull the needle through the fabric with one hand, hold the thread tight with the other. Then, using the hand holding the needle, wrap the thread around the needle 2-4 times (depending on how big of a knot you want to make) and then push the needle back through close to where you entered the fabric. Continue to hold the thread tight until it’s pulled all the way through and the knot is formed.
Step 5: Lastly, remove your hoop and place your material in a bowl of water. Let it soak for a few minutes and gently rub away the Magic Paper. Let it dry, then show off your new threads around the barn!
This DIY how-to for hand embroidering jeans appeared in the May/June 2023 issue of Young Rider magazine. Click here to subscribe!